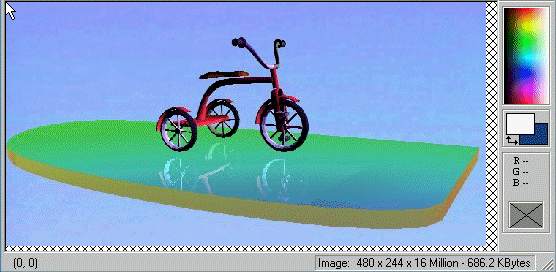
Open the image in the Pain Shop
Pro.

Now look at the information bar at the bootom of the Paint Shop Pro
screen. At the right hand side, you will see the
information about the image. They are the size of the image in pixels
(width x height), and the color depth. These numbers do not change
unless we change the size of the image or reduce/increas the color
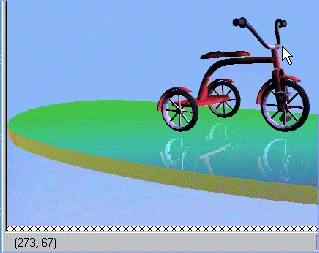
depth. At the left hand side a pair of numbers are displayed indicating
the coordinate of the mouse cursor (if your cursor is an arrow shape,
that point is the tip of the arrow). This information changes as you
move the mouse over the image. The coordinate values increase as the
mouse is moved to the right or down. The origin, or (0, 0) point is
located at the upper left corner of the image, and the heighest numbers
correspond to the lower right corner of the image (=size of the image).

Try this in Paint Shop Pro with the image you are intending to use as
your imagemap.
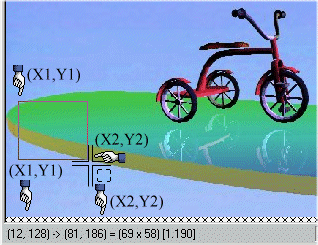
For a rectangular hot spot, we need to identify two pairs of
coordinates, one at the upper left side of the rectangle, and one at the
lower right side of the rectangle. You can either move your mouse over
those two points and record the coordinates on a piece of paper and then
put them into the SHAPE tag, or you can use the selection button from the
menu. Click on  and
select a rectangle of around the area you would like to be a hot spot. and
select a rectangle of around the area you would like to be a hot spot.

DO NOT release the the left mouse button. While the left mouse
button is depressed, look at the bottom left corner of the screen. You
can record coordinate values from the information provided there. For
example, with the above information, the SHAPE tag will be:
<AREA SHAPE=rect COORD="12,128,81,186">
For a circlular hot spot, you need the center of the circle and its
radius. The easiest method is to move the mouse pointer to the center of
the circle and record the information. Then move the mouse to the right
or left to a point on the primeter of the circle such that the height
coordinate of
the new point is the same as the the height coordinate of the center
point. Then the difference in the width values is the radius of the
circle. You can also change the selection Type to a circle and try
that, but it is not easier than what was just mentioned.
With a polygonal shape, again the best approach is to move your mouse
pointer over the corner points of the polygon and record the
coordinates. In my opinion, considering the fact that you are in fact
looking for
close enough points, and the fact that you are not creating image maps
everyday, the above approach is the most logical method.
|