
|
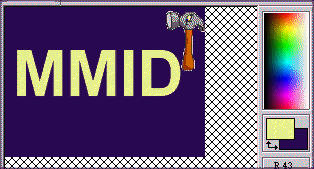
As mentioned before, it is a very
good practice to have the background color in the Color Pallete and the
image the same. If they are not the same do it now before proceeding to
save the image.
|
|

|
From the menu, select "Colors", and
"Set Pallette Transparency" and click once. Since the color depth of the
image is more that 256 colors used in GIF compression, you will get a
warning message .
|
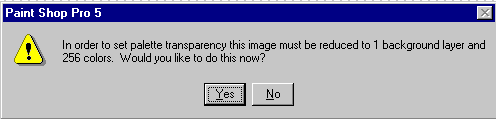
Click on "Yes".
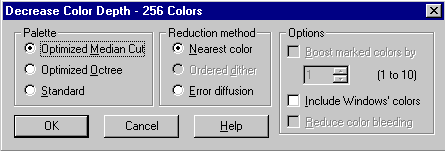
A new window opens that will provide
you with some options on how to reduce the color depth. Accept the default
and click on "Ok".
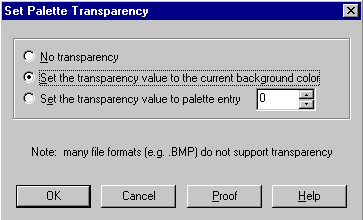
In the new "Set Pallette Transparency"
window, choose, "Set transparency
value to the background color" and click "OK".
|
|
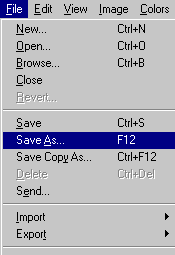
From the menu, select "File", and
"Save As" and click once.
|
|
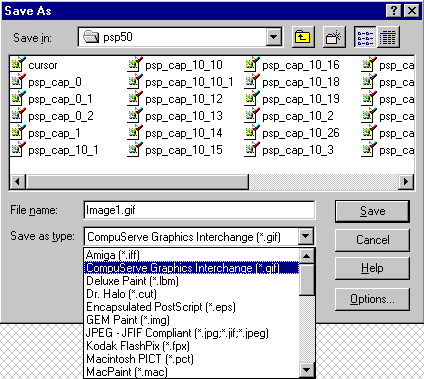
A new window opens which would
allow you to choose the image compression method in the "Save as type"
box, plus other options that are familiar for Windows 95 users. Select
GIF as file type, choose a name for your file and save.
|
|
Repeate the above procedure,
except that this time choose " No Transparency", instead of
"Set transparency
value to the background color". Save the file under
different name.
|
If you now look both images with
Painshop Pro, they look exactly the same.
|

|

|
But when they are contained in an
HTML document, the browser would display them differently. Notice how
the background color of the second image is behaving as if it did not
exist at all. That background is transparent to the background color
of the document which happens to be grey in this case.
|
|

