
|
Save the image on the right by
right clicking over the image and saving it as hammer.gif to your working
dirctory. In
your Paintshop Pro, select "File", and "Open" and load the new hammer.gif
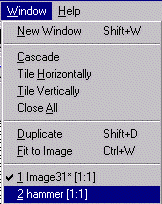
file. You can alternate between hammer.gif and the other image by
selecting "Window" from the menu, and ckicking on the name of the
image.
|

|
|
You can alternate between hammer.gif and the other image by
selecting "Window" from the menu, and ckicking on the name of the
image. With hammer.gif as your active image, select "Edit", and
"Copy" from the menu. This will copy the entire hammer.gif into
the clipboard.
|
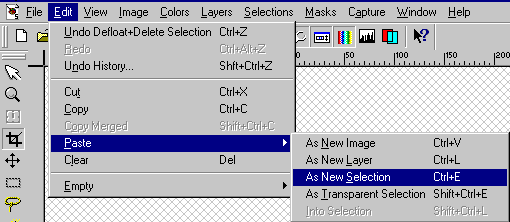
With the MMID image active, select
"Edit", "Paste", and "As New Selection" from the menu and click once.
|
|
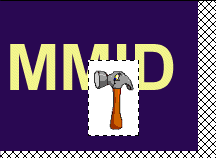
The entire hammer.gif image now
appears on the MMID image. Notice the moving dashed lines around
the hammer image. Again, you can move the new image and place it where you
want. When finished, just right click to create the new image made from
the combination of the two. As we recognize the white background
of the hammer.gif image is covering over ares of the MMID image
that I might need to be visible. Undo the operation and delet the
hammer image selection from MMID image.
|
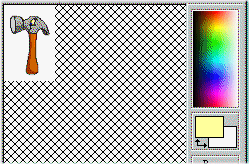
Go back to the hammer.gif image
window. Make sure that the background color in the Color Pallete is
exactly the same as the one for the image (white). If it is not, click
on the "Dropper" Button
 . A
dropper appears
as you move your mouse over the image. Move to a point on the
background of the image and right click. The background color in the
Color Pallete changes to the color your dropper just picked. Now,
again from the menu, select "Edit", and "Copy". . A
dropper appears
as you move your mouse over the image. Move to a point on the
background of the image and right click. The background color in the
Color Pallete changes to the color your dropper just picked. Now,
again from the menu, select "Edit", and "Copy".
|
|
|
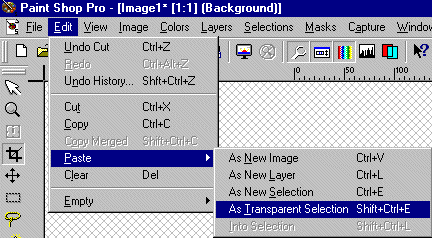
With the MMID image active, select
"Edit", "Paste", and "As Transparent Selection" from the menu and
click once.
|
|
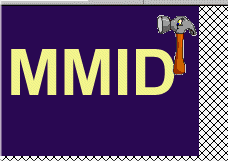
The hammer image appears on the
MMID image, but this time the background is transparent to the
background color of the MMID image. Move the hammer to a location of
your choice on the image and right click to set that hammer at that
location.
|
|
|