
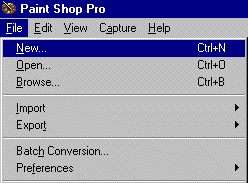
From the menu, choose "File"
and then "New". Alternatively, you can click on the
 button on
the toolbar.
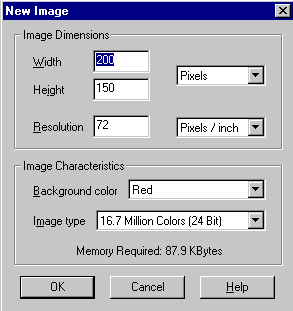
A new window opens. You can
identify, the image size (in pixels), background color, and the color
depth (image type). Choose a 200 by 150 image, red background color, and
16.7 million colors and press "OK".
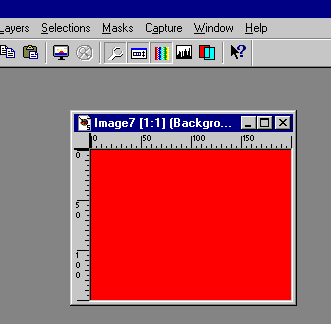
A new image appears somewhere in the
main Paintshop Pro window.
Maximize that image. Now, the image
appears at the center of the main window (by default).

It is a very good idea to have the
background color of the picture and the background color of the Color
Palette the same. Click on
 button on
the toolbar, then move the mouse over the image and right click.
The whole image will be painted in the same color of the
background Color Palette. Click on
 button on
the toolbar, then move the mouse over the image. Notice that the
mouse
sign on the screen changes to double crosshair with the letter "A"
underneath. Click anywhere in the image area.
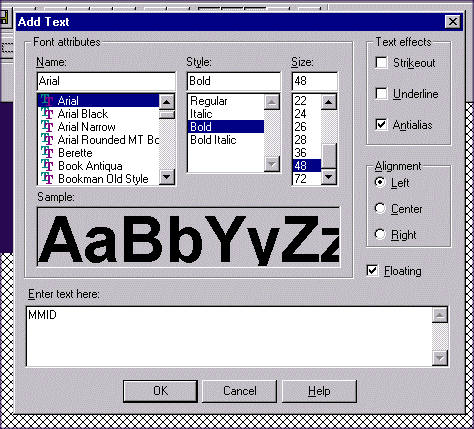
A new "Add Text" window appears,
from which you can choose font size, type, style, text effect and
allignment. In the lower part of the window there is a smaller window,
"Enter text here". Choose, Arial, Bold, 48, and then type "MMID" for the
text.
Press "OK".

The MMID text will appear on the
image. However, you notice that around
the text dashed lines are blinking. The text at this time is temporarily
placed on the image. Move your mouse over the text and notice that it
changes to four small arrows in four different directions
 . Hold down
the
left mouse button and move the text to where you want it to be,
then release the left button, and press the right one.

The MMID text now becomes part of
the text. You can still use the Edit/Undo option from the menu or
 button on the toolbar to undo the selection. You are now ready to save
the file and use it in your web pages. We will do that a little bit
later after we look at few other features of the Paintshop Pro while
working on the current image.